Guide to Saving Seeds
A Step by Step Approach

If you're a passionate gardener, you probably know that growing heirloom plants is a rewarding way to connect with traditional agricultural practices. One of the most satisfying aspects of cultivating heirloom varieties is saving your own seeds for future planting. This practice not only helps you maintain plant diversity but also ensures that you have a continuous supply of the varieties you love. Here’s a straightforward, step-by-step guide to help you save heirloom seeds effectively.
Step 1: Choose the Right Plants
Not all plants are ideal candidates for seed saving. For the best results, select healthy, robust heirloom plants that have shown strong growth throughout the season. Look for plants with desirable traits such as good flavor, high yield, or disease resistance. Avoid plants that appear to be diseased or stressed, as their seeds may not perform well.
Step 2: Allow Seeds to Mature
Heirloom seeds need to mature fully on the plant to ensure they are viable. This can vary by plant type:
Vegetables (Tomatoes, Peppers, Beans): Allow the fruits to ripen completely on the plant. For tomatoes and peppers, this means waiting until they are overripe and starting to shrivel.
Fruiting Plants (Cucumbers, Squash): Leave the fruits on the plant until they are fully mature and starting to dry out.
Greens (Lettuce, Spinach): Allow the plants to go to seed, which means letting them bolt and produce flower heads. Once the seeds are dry and brown, they’re ready to harvest.
Step 3: Harvest Seeds
When seeds are ready, it's time to harvest:
Dry Seeds: For plants like beans and peas, remove the pods and let them dry completely before extracting the seeds. You can use a paper bag or an old envelope to collect them.
Fruiting Seeds: For tomatoes and peppers, scoop out the seeds and rinse them in a sieve. Spread them out on a paper towel to dry.
Seeds from Greens: Shake or cut the dried flower heads into a container to release the seeds. For smaller seeds, use a sieve or screen to separate them from the chaff.
Step 4: Clean the Seeds
Proper cleaning is crucial to ensure seed longevity:
Remove Debris: Use a small brush or cloth to clean off any remaining plant material.
For seeds like tomatoes and other pulpy fruit scoop out the seeds and rinse as much of the pulp and plant matter away as you can. Put the seeds and remaining pulp in a container with water and let sit in a warm spot (80-90°F) for at least one day, avoiding direct sunlight, to allow the remaining pulp to ferment. During fermentation, the tomato seeds will separate from the gelatinous coating surrounding them. Viable seeds will sink to the bottom, while dead seeds and debris will float.
Once a thin layer of mold forms on the surface, carefully pour off the floating solids and dead seeds. Rinse the sunken seeds thoroughly under running water, using a fine mesh strainer for best results. After cleaning, spread the seeds on a screen or coffee filter to dry for 5-7 days.
Step 5: Store Seeds Properly
To keep your heirloom seeds viable, store them in a cool, dry place:
Containers: Use airtight containers like glass jars, plastic bags, or sealed envelopes. Label each container with the plant type and date of harvest.
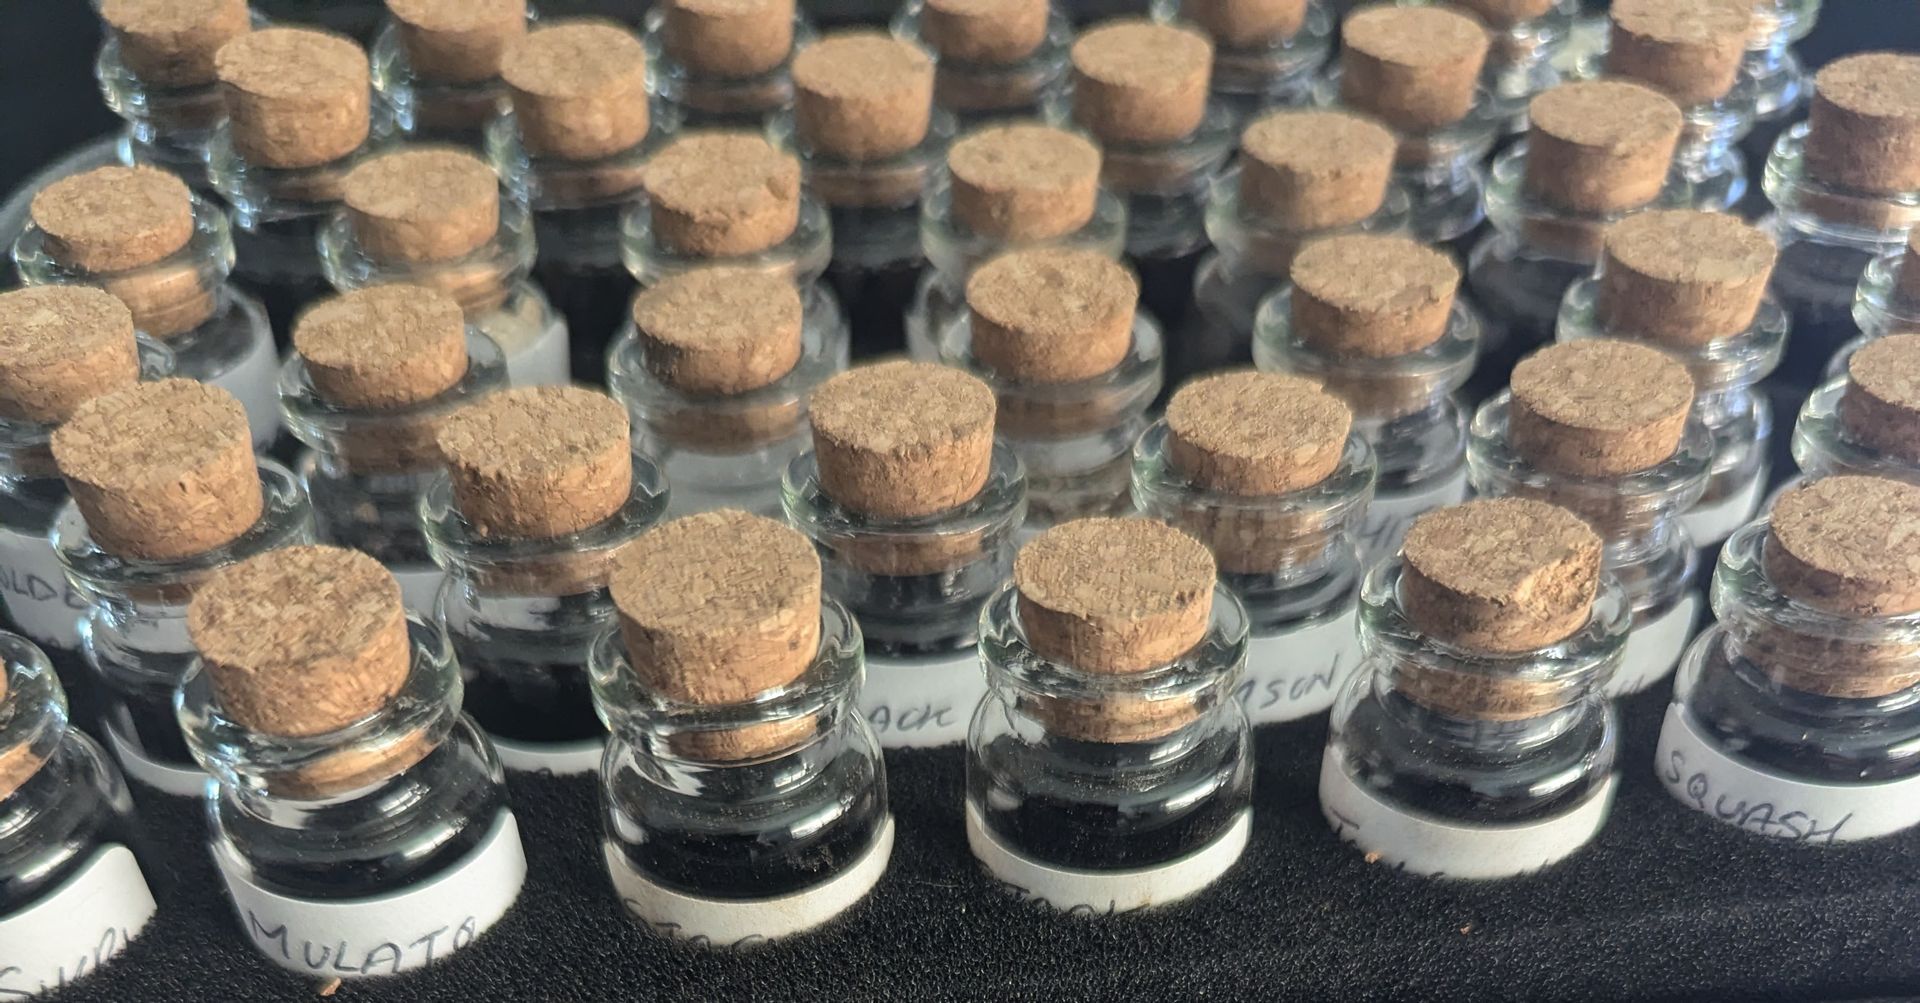
Location: Store seeds in a cool, dark place. A dry basement, a cool closet, or even a refrigerator can be ideal. I keep my seeds in a case I bought on Amazon. It has 50 small vials with cork stoppers that are especially good for small seeds. Larger seeds I vacuum seal. Everything is stored in the bottom drawer of the refrigerator.
Step 6: Test Seed Viability
Before planting saved seeds, it’s a good idea to test their viability to ensure they will germinate:
Germination Test: Place a few seeds on a damp paper towel, fold it, and place it in a warm, dark location. Check the seeds in a week or so to see how many have germinated. This will give you an idea of their viability.
Step 7: Use and Rotate Seeds
When planting saved seeds, remember to use them within a few years for the best results. Heirloom seeds generally have a good shelf life but may lose potency over time. Rotate your seeds regularly to maintain a healthy gene pool and ensure continued plant vigor.
Saving heirloom seeds is an empowering and enjoyable part of gardening. By following these steps, you can continue to grow the varieties you cherish, contribute to the preservation of plant diversity, and enjoy the satisfaction of nurturing plants from your own saved seeds. Happy seed saving!


